Padel technique · 9 min read
Improve your padel serve: technique, rules and drills
A good serve does not need to be fast. It starts the point reliably, keeps the return low and gives you time to take the net together with your partner.
PadelLens.AI editorial team
Published 18 July 2026
Training guidance for recreational players. It does not replace individual coaching.
The essentials in 20 seconds
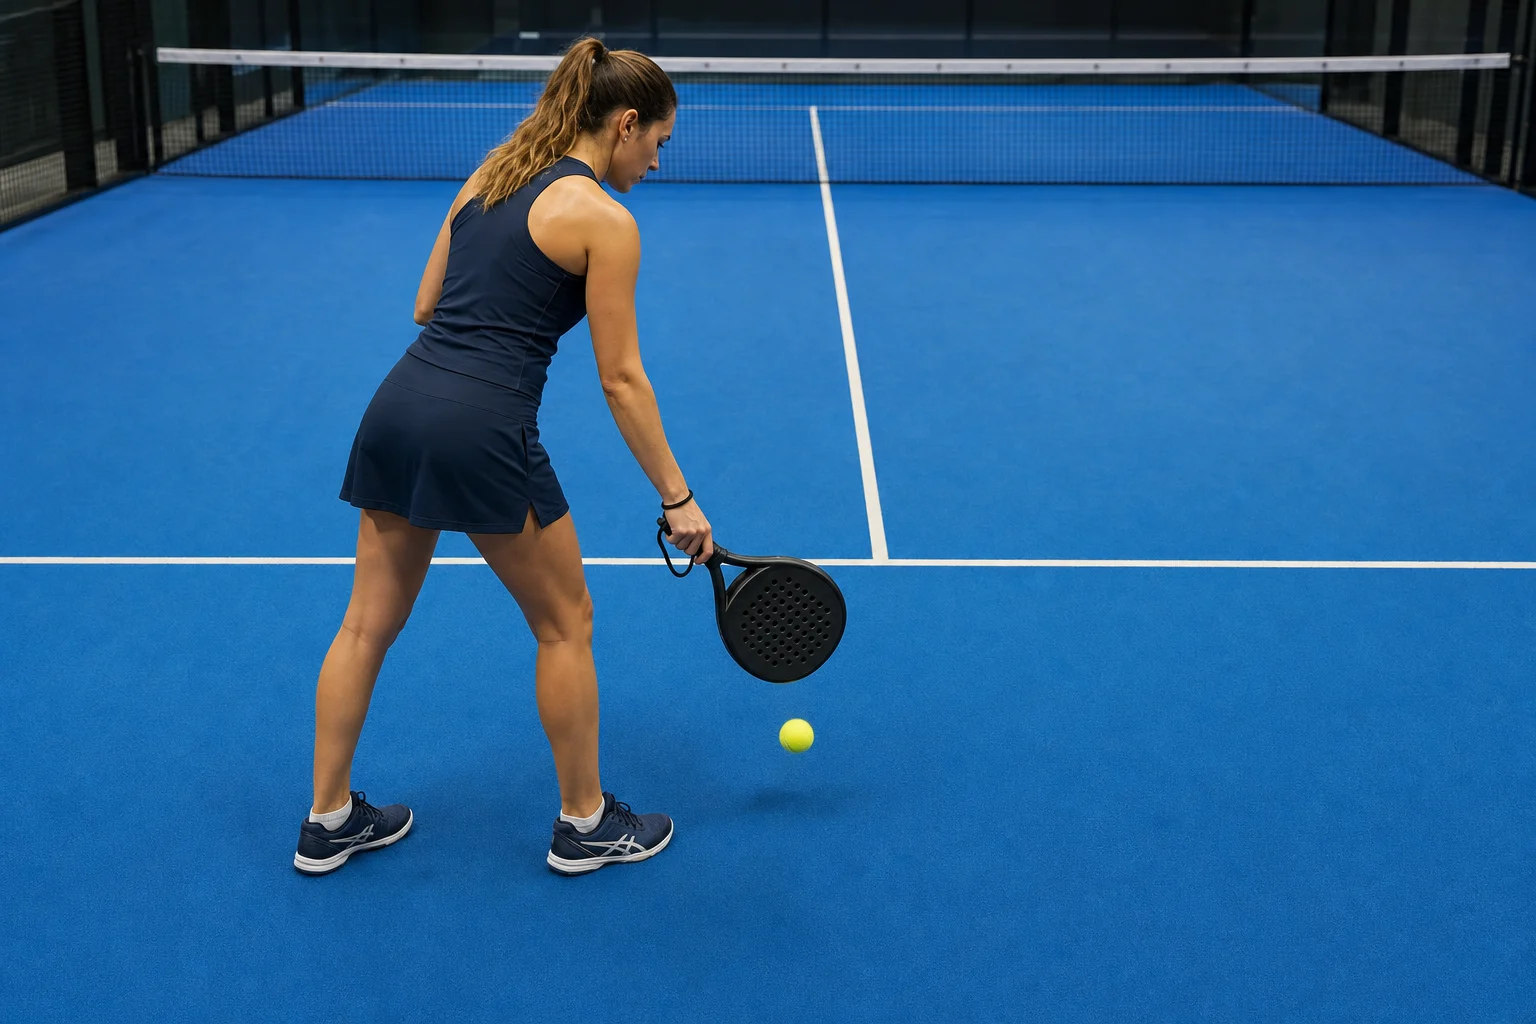
- • Bounce the ball behind the service line
- • Make contact at or below waist height with one foot grounded
- • Prioritise placement and a low bounce over pace
- • Move forward under control after the serve
Purpose and rules
What should your padel serve actually achieve?
Every point starts with the serve, but padel does not use a tennis-style overhead delivery. Bounce the ball in your own service area and play it diagonally into the opposite service box. Contact must be at or below waist height, with at least one foot on the ground.
Tactically, a reliable low return matters more than outright speed. A controlled serve down the middle, into the body or towards the side wall can limit the receiver. The serve is only complete when you move forward and close the net with your partner.
| Variation | Main purpose | Risk | Useful focus |
|---|---|---|---|
| Flat and safe | High percentage, clear start | low | Depth and direction |
| With slice | Lower, lateral bounce | medium | Clean contact before pace |
| Into the body | Limit the return path | low to medium | Safe margins from the lines |
Technique
The padel serve in five steps
- 1
Start stable behind the line
Stand side-on and fully behind the service line. Set up towards the diagonal target and keep a relaxed grip.
- 2
Release the ball under control
Let it drop from your free hand slightly in front and to the side. It must bounce in your service area; a high toss only complicates timing.
- 3
Use a compact backswing
Take the racket head low behind you and shift your weight smoothly. The swing is shorter than a tennis groundstroke.
- 4
Meet it below the waist and in front
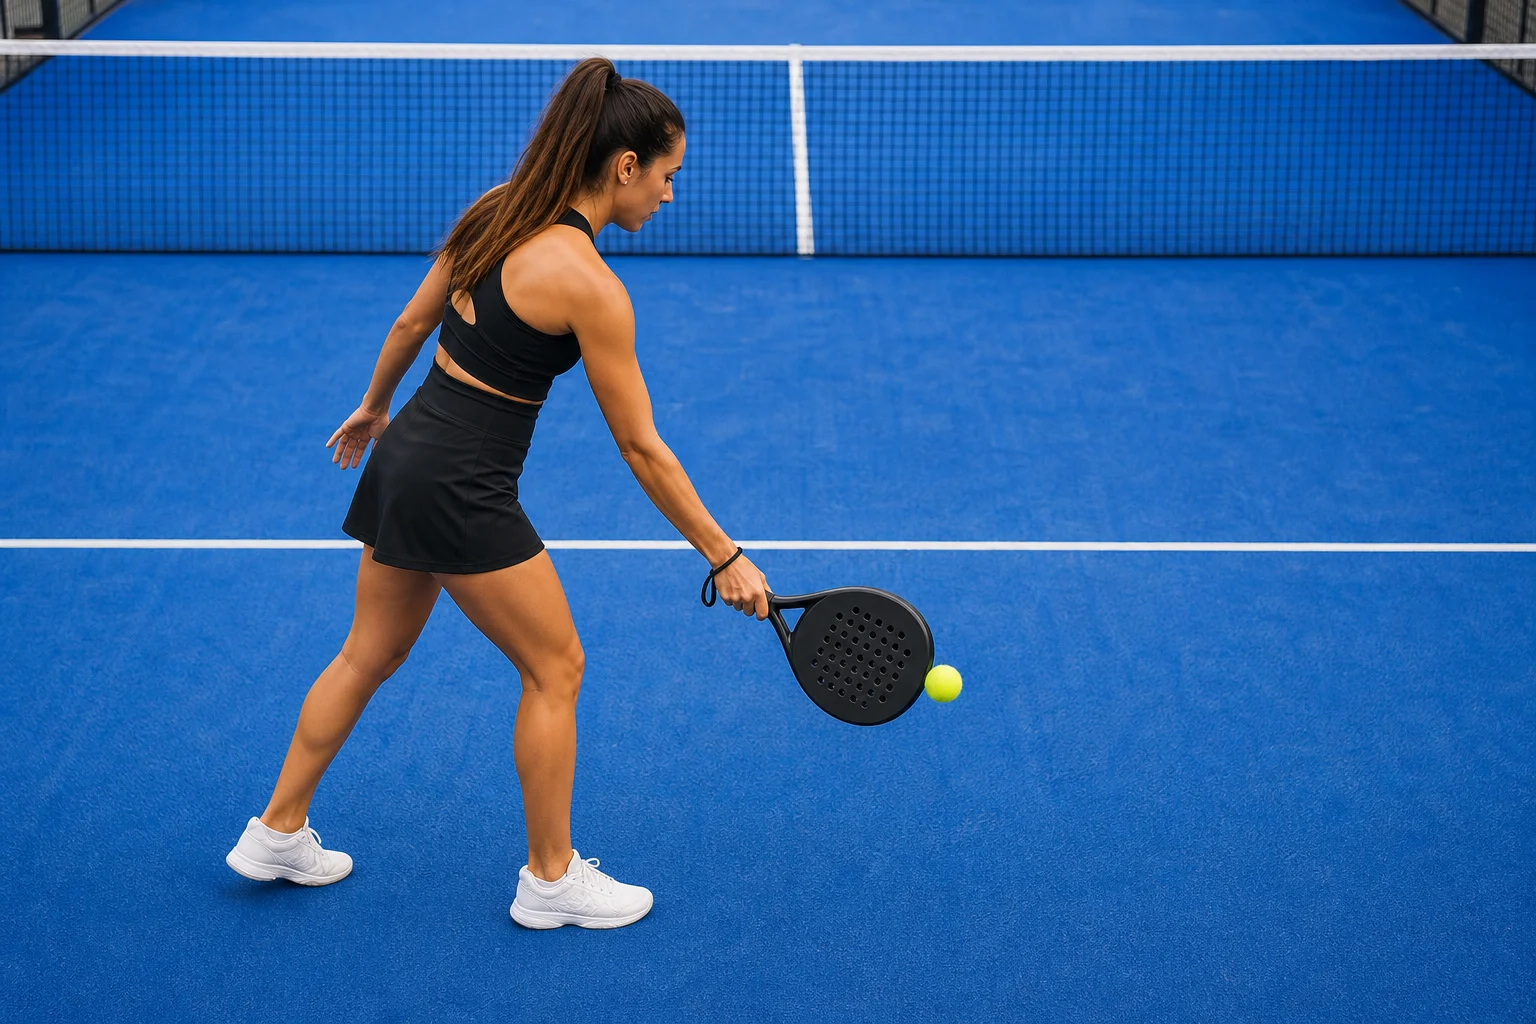
Strike the rising or falling ball at or below waist height, slightly in front of your hitting side. Keep at least one foot grounded.
- 5
Follow through and move up
Finish towards the target and move forward with small controlled steps. Read the return from a balanced position.
Movement sequence
Bounce, contact, first step
- 01
Bounce the ball
Beside the hitting side and fully behind the service line.
- 02
Contact low
Below the waist, slightly in front and with one foot grounded.
- 03
Close the net
Move forward under control together with your partner.
Legal contact zone
BELOW WAIST
Low, in front and balanced
The contact height is a guide. Exact height depends on your bounce and body shape; waist height is the legal ceiling, not the technical target.
- The ball bounces before the swing
- Contact slightly in front of the hitting side
- At least one foot remains grounded
Self-check
Five common mistakes – and better fixes
You toss the ball upwards
A toss pushes contact higher and makes the required bounce inconsistent.
Fix: Release the ball from a quiet hand and learn one repeatable bounce.
A foot or the ball crosses the line
Starting too close invites a foot fault or lets the ball travel over the line before contact.
Fix: Build in visible space and keep the whole line in your practice video.
You chase pace only
A hard serve that sits up gives the receiver time and raises your error rate.
Fix: Aim for depth and a low second bounce; add pace only when your percentage is stable.
Contact crowds your body
An inconsistent bounce removes space and changes the racket face.
Fix: Bounce slightly ahead and beside your hitting side, not between your feet.
You watch the serve
The return then reaches your feet while your partner is already moving up.
Fix: Link the follow-through to your first step and advance as a pair.
Practice
Three drills for a reliable serve
Bounce window
Mark a small area behind the line. Drop the ball into it and catch it after the bounce. Add the racket only once the height is repeatable.
Wide, body, middle
Split the diagonal box into three safe corridors. Commit each set to one zone and count placement, not speed.
Serve plus volley
Serve, move forward under control and start the practice point with your first volley. This connects delivery and court position.
Video analysis
How to film your serve usefully
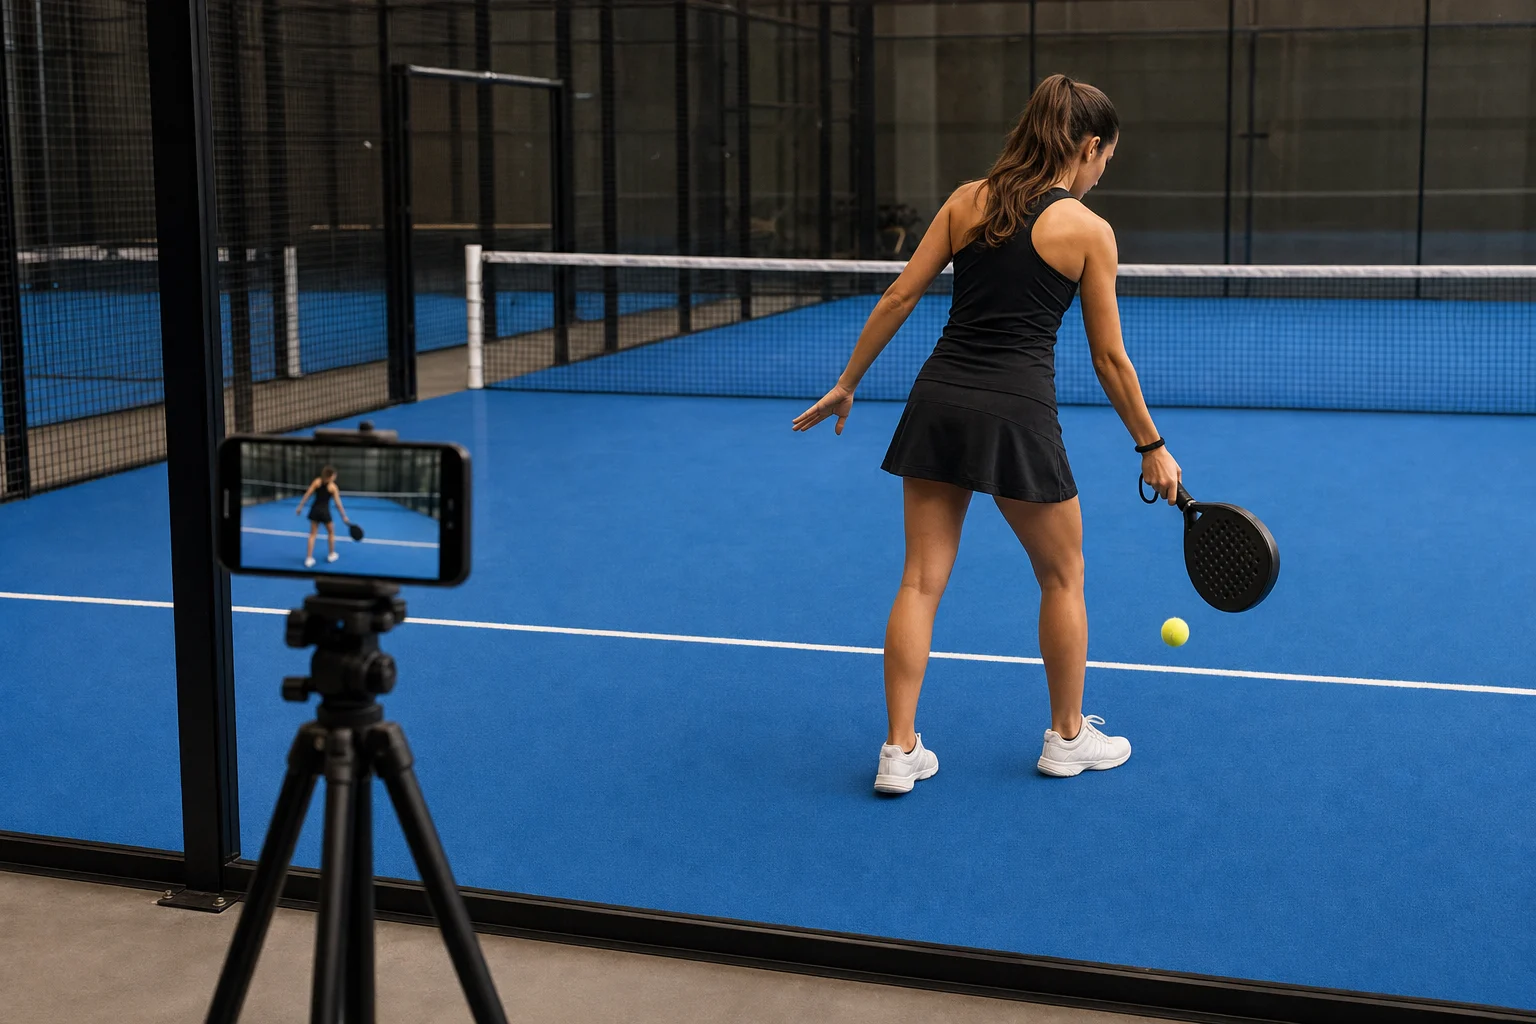
A useful view must show the line, bounce, contact height, both feet and first steps at the same time. A side-rear angle reveals more than a tight front view.
Position
Side-rear to the hitting side, ideally outside the glass and clear of a post.
Height
Around hip height so bounce and contact height remain comparable.
Framing
Full body, service line, ball and two first steps; keep the phone fixed.
FAQ
Common questions about the padel serve
Must the ball bounce before the serve?
Yes. Under FIP rules, bounce it in your own service area behind the line before playing diagonally into the opposite service box.
How high may I contact the ball?
Contact must be at or below waist height. A controlled contact point is often slightly lower and in front of the hitting side.
Can I jump when serving in padel?
At least one foot must touch the ground at contact. Your feet may not touch or cross the service line or the imaginary extension of the centre line before the strike.
What happens if the serve touches the net?
If it touches the net and then lands correctly in the box, the serve is generally replayed. If it then hits the metal fence before a second bounce, it is a fault.
May a valid serve hit the glass after bouncing?
Yes. If it first lands in the correct service box, contact with the side or back glass is valid. Contact with the metal fence before the second bounce is a fault.
Sources and technical note
Rules are based on the current International Padel Federation Rules of Padel. Technique and tactics were checked against public guidance from the LTA and Swiss Tennis. Movement varies with body shape and coaching approach.